Reviving a "Dead" Sourdough Starter.
Don't assume that your poor neglected sourdough starter is dead! Sourdough Starters are actually quite hard to kill. There is an excellent chance that the starter you forgot in the back of your fridge for a month or two will happily come back to life with a little attention and a fresh dose of food!
First, if you are brand new to sourdough baking, you might want to first read What is a Sourdough Starter (And why you should want one!). If your starter has failed to activate or thrive please take a look at Sourdough Starter Tips and Troubleshooting.
Reviving a Dead Sourdough Starter: A Step-by-Step Guide
Sourdough starters are micro-colonies of wild yeast and unique lactic acid bacteria. Once active they are usually VERY resilient. A healthy sourdough starter is usually the biggest kid on the block in your kitchen, and anything else that tries to get a foothold will be immediately outcompeted by the billions of active lactic acid bacteria in your starter.
A starter can, however, sometimes fall into a dormant state that appears lifeless. This is most likely to happen if you have left it unattended for a long period without feeding. Signs of a struggling or dead starter may include a lack of bubbles, no rise after feeding, and an off-putting odour.
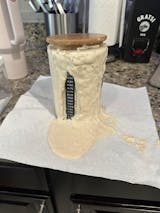
A neglected starter may also have a layer of liquid on top called the "hooch". After a long enough period the hooch might even be dark or black in colour as opposed to clear. Understandably to the uninitiated the "hooch" is a scary sight, and often bakers will assume this means the starter is "bad" or "dead", and worse they will throw it out! Don't do this! Your starter is likely very much alive! With the right care and attention, you can usually bring it back to life.
Here are the steps to revive a seemingly lifeless sourdough starter.
The Revival Protocol
1. Assessment
Start by examining your sourdough starter. Look for any signs of mould or unusual discolouration. If there is mold please throw it away. You can always order another starter at kensingtonsourdough.ca! If it smells really rotten and like garbage throw it away as well.
If it smells like nothing, bread, vinegar or acetone you are good to proceed. Don't worry if there is a greyish or black liquid on top! Just pour it off and proceed with Step 2.
2. Discard a LOT
Discard a significant portion of your starter, leaving no more than 30-40 grams. This will not look like much in your jar! You might want to transfer this amount to a fresh jar as well if the old jar looks gross. Note: Be careful that there is no soap residue on any jar that you put starter in!
3. First Feeding
Feed the remaining starter with 100 grams each of flour and lukewarm water. For this feeding add the water first and stir fairly vigorously, then add the flour and stir thoroughly. Let the starter sit at a warmish room temperature for 12 hours.
4. Second Feeding after 12 hours
Discard all but 50 grams of your starter. Feed it with 100 grams of flour and 100 grams of lukewarm water. Mark the level with a rubber band!
5. Repeat and Adjust
If the starter doubles in size after this feeding congratulations! You have revived your starter and it is ready to use! If not, repeat step 4 every 12 hours until it does!
Tips for the revival process:
1. Your starter wants to be reasonably warm. Yeast and bacteria thrive in temperatures between 75-85°F (24-29°C). If your house is quite cold you might use the oven or microwave with a light on to keep it warm. Placing it on top of your fridge can also help.
2. Stick to a consistent feeding schedule. Regular feedings provide the necessary nutrients for the microorganisms to thrive, and your starter will happily adapt to a schedule if consistent.
3. Clean any jars or lids that are gunked up (this will help remove any potential contaminants) but always avoid having any cleaning residue in contact with your starter.
4. Be sure to use the flour your starter is used to and good clean water that does not have chlorine! See my Tips and Troubleshooting for more information. Also What is the best water to use for my sourdough starter.


