The "No Feed" Sourdough Starter Method
The "No Feed" sourdough starter method is a low maintenance approach for bakers who only want to use their starter once a week or less.
Unlike other sourdough starter feeding methods that often involve daily or regular feeding and discard routines, the "No Feed" method allows for just discarding and feeding once per bake! It is really straightforward so lets dive in!
Note: if you are brand new to sourdough you might want to read the article What is a Sourdough Starter? (And why you should want One!) first!
The No Feed Method Explained
The No Feed method skips the need for any regular maintenance feeding of your starter. Instead, you keep the starter in your fridge in an un-fed state. When you want to bake you will remove it, feed it, wait for it to become active, use it to bake, then put it back in the fridge without feeding it again. That's it!
Step-by-Step Guide
1. Get your starter nice and Active!
Begin by establishing a healthy sourdough starter through regular discard and feedings. Once your starter is vigorous and active, you can transition to the No Feed approach. If it has been doubling consistently in size after feeding for a week or more it is likely ready for this switch.
2. Store it in the Refrigerator:
Transfer your starter to the refrigerator. The cold environment will slow down its activity, allowing you to extend the time between feedings. Remember to use a parchment paper and rubber band lid for proper storage. You can read more about how to store your starter here! If you are wondering what the best jars to use for your sourdough starter for safe storage the answer is the Weck 743 or 745.
3. Extended Feeding Intervals:
With the No Feed method, you can now go longer between feedings—sometimes up to two weeks or more. This flexibility is ideal for those with busy schedules.
4. Room Temperature Activation:
When you're ready to bake, take your starter out of the refrigerator and let it come to room temperature or close to. This reactivates the yeast and lactic acid bacteria, revitalizing the starter.
5. Discard and feed before Baking:
Before using the starter in your recipe, discard* down to half a cup and then feed it (using your regular 1:1:1 or 1:2:2 ratio). Then allow it to rest at room temperature for a few to several hours until it reaches its peak! This ensures that it's at its peak of activity and flavour and you will get your best results baking.
*Note: How much you discard depends on how much you used the time before. If you used lots of it you might not need to discard at all!
6. Take what you need for baking, and return it to the fridge!
Each recipe will have a first step that involves using some of your starter. You might also want to take some extra for a "discard" recipe such as crackers or english muffins!
After this cover it up again and just put it back in the fridge. Traditionally bakers would do another discard and feed before putting it away, however the theory of the "No Feed" method is that this in unnecessary! If your starter is active it will be just fine and make great bread without the extra feedings, saving you time and flour!

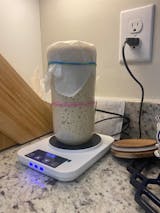
The legendary Weck 745 Tulip Jar pictured above!


